Ethernet VCI Remote Diagnostics: BMW ENET Cable Setup & Workflow Guide
- James Whaling

- Apr 25
- 2 min read
Updated: Jul 5
Learn how to configure Ethernet VCI for BMW ENET cable and perform remote diagnostics with eLinehub.
Got an Ethernet VCI? Let's Set Up Remote Diagnostics Together!
Got a VCI device with an Ethernet port, like the BMW ENET Cable or BENZ C4?
Wondering how to perform remote diagnostics with it?

This step-by-step guide will walk you through the process, using the BMW ENET Cable as an example.
Step 1: Mechanic Creates a Remote Diagnostic Order
Launch the Mechanic software and create a new remote diagnostic order.

When selecting the VCI type, choose ENET Cable.

You can either post the order to the Order Market and wait for a Technician to accept it, or assign it directly to a specific Technician team for faster coordination.
Step 2: Connect the VCI Device
Once the order is live, the Mechanic needs to prepare the ENET cable and make the following connections:
Plug the OBD end into the vehicle’s diagnostic port.
Plug the RJ45 Ethernet end into the computer’s Ethernet port.

Now, the vehicle is linked to the Mechanic’s computer, and everything’s ready for the Technician to connect remotely.
Step 3: Technician Initiates the Remote Connection
The Technician logs in and selects the order they accepted.
On the connected device, select the shared Ethernet interface (RJ45) provided by the Mechanic.
Click the "Connect" button. The system will now create a remote mapping to that Ethernet port.
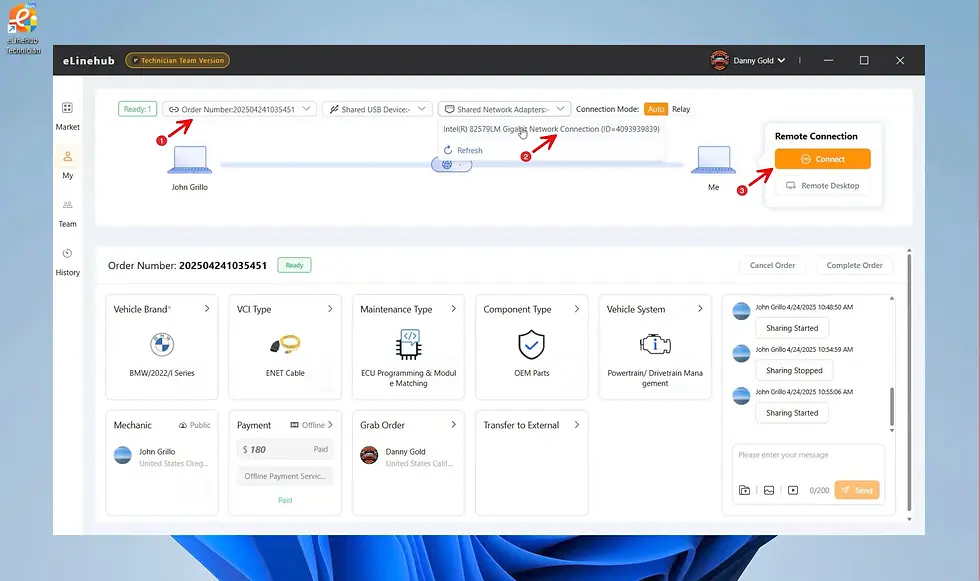
At this point, it’s as if the Technician’s PC has the ENET cable directly plugged in—it’s a seamless, virtual connection to the VCI.
Step 4: Start Remote Diagnostics or Programming
Once the connection is stable, the Technician can launch their diagnostic software to perform remote fault scanning or vehicle programming.
The whole process is fast, secure, and super easy to use—even if you’re new to it!

Give it a try and experience the power of remote diagnostics today!
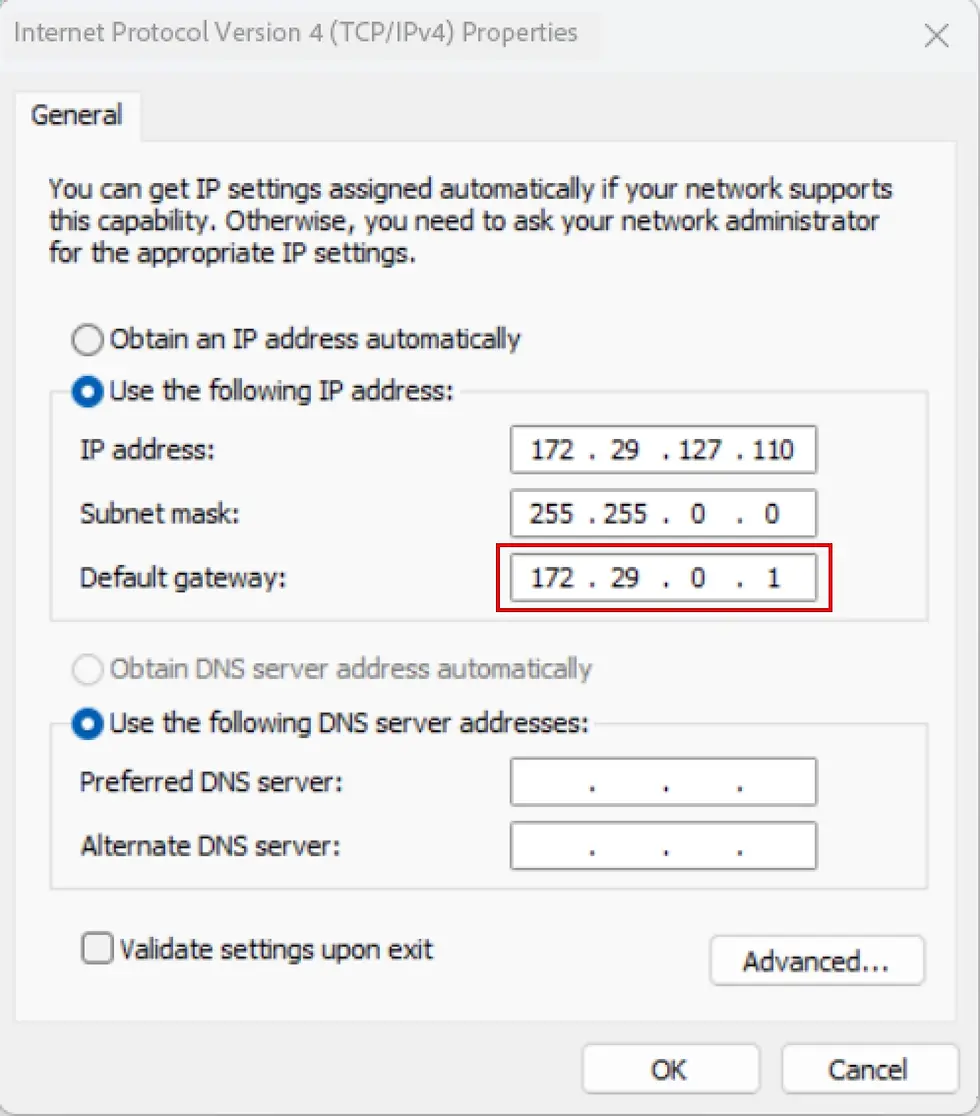
Note: When using a SD Connect C4, make sure to set the Default gateway address on the Mechanic’s computer to “172.29.0.1” to ensure a stable network connection.
Comments